테이블쏘 인서트 튜닝할때 MDF나 자작합판을 많이 사용합니다.
대충 만들다보면 평도 안맞고 톱날과 유격이 많게 되면 톱밥이 많이 날려 눈에 들어가기도 하죠.
이렇게 하게 되면 정밀한 인서트를 만들수 있고 톱밥도 덜 날리며 절단면도 더욱 깨끗하게 나올 것 같습니다.
Must-Have Table Saw Add-On
Make a zero-clearance insert for clean, safe cuts on your saw.
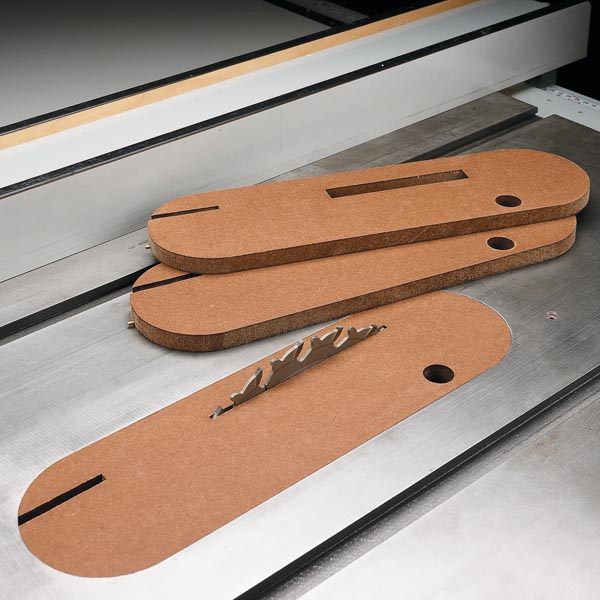
I rely on my table saw for everything from crosscutting and ripping boards to cutting joinery like dadoes and rabbets. No matter what the operation is, a clean, splinter-free cut is a must. The trouble is even if your saw is tuned up, you can still end up with a ragged edge. Thankfully, the solution is simple and inexpensive — a shop-made, zero-clearance insert.
The reason you get better cuts with a zero-clearance insert is that the opening in the insert exactly matches the thickness of the blade. This fully supports the workpiece as it’s cut so fibers can’t tear away.
필수 테이블 톱 추가 기능
톱에 깨끗하고 안전한 칼집을 위해 제로 클리어 인서트를 만듭니다.
저는 식탁용 톱에 의지해서 가로 자르기, 널빤지 찢기에서부터 다도, 토끼 같은 조이너리에 이르기까지 모든 것을 다룹니다. 어떤 작업이든 깨끗하고 가시가 없는 컷은 필수입니다. 문제는 톱을 조정해도 가장자리가 너덜너덜해질 수 있다는 것입니다. 다행히 이 솔루션은 간단하고 저렴합니다. 즉, 무간격 제로 인서트입니다.
무간격 삽입으로 더 잘리는 이유는 삽입물의 개구부가 블레이드 두께와 정확히 일치하기 때문입니다. 이렇게 하면 섬유가 찢어지지 않도록 잘려나간 공작물을 완벽하게 지지합니다.
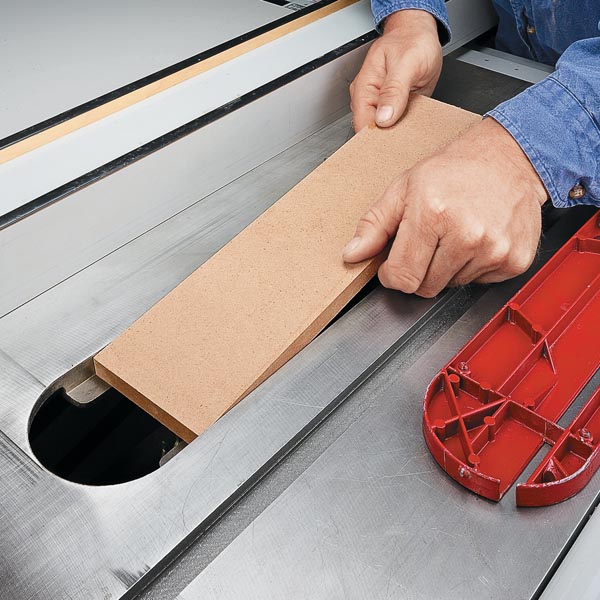
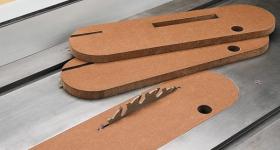
The first step in making the insert is to cut the blank to width. I use 1⁄2” MDF because it’s inexpensive, flat, and easy to work with. I aim for an easy slip fit in the opening with no side-to-side play . By the way, I usually make several inserts at a time. Then I always have one on hand.
인서트를 만드는 첫 번째 단계는 빈 칸을 너비로 자르는 것입니다. 1½인치 MDF는 저렴하고 평평하며 작업하기 쉽기 때문에 사용합니다. 사이드 투 사이드 플레이가 없는 오프닝에 쉬운 슬립핏을 목표로 합니다. 그런데 저는 보통 한 번에 여러 개씩 넣어요. 그럼 난 항상 하나씩 가지고 있습니다.
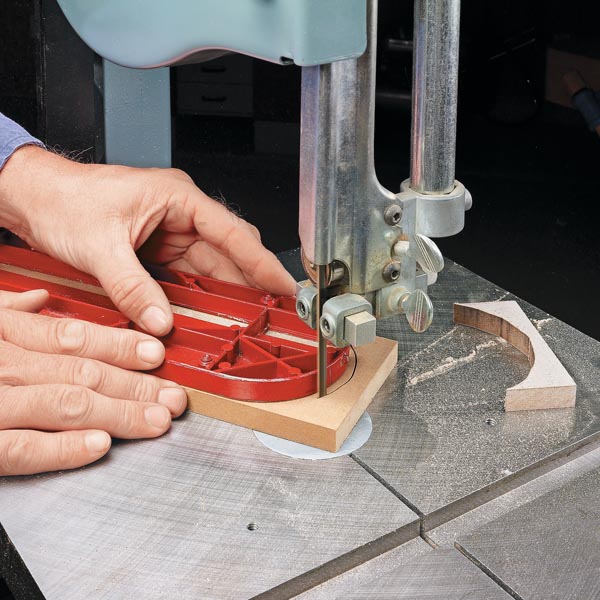
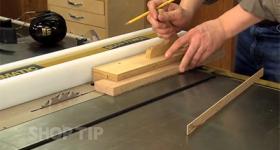
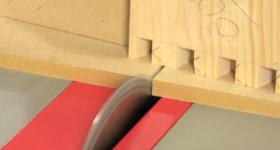
With the blank cut to the final width and rough length, I attach the stock insert with double-sided tape. The stock insert will act as a template for the next few steps. Cutting the rounded ends is a two-step process. The first step takes place over at the band saw. Follow the curve of the stock insert and cut away most of the waste.
최종 너비와 거친 길이로 블랭크 컷으로 스톡 인서트를 양면 테이프로 첨부합니다. 재고 인서트는 다음 몇 단계의 템플릿으로 사용됩니다. 둥근 끝을 자르는 것은 2단계 과정입니다. 첫 번째 단계는 밴드 톱에서 다시 시작됩니다. 재고 인서트의 곡선을 따라 대부분의 폐기물을 잘라냅니다.
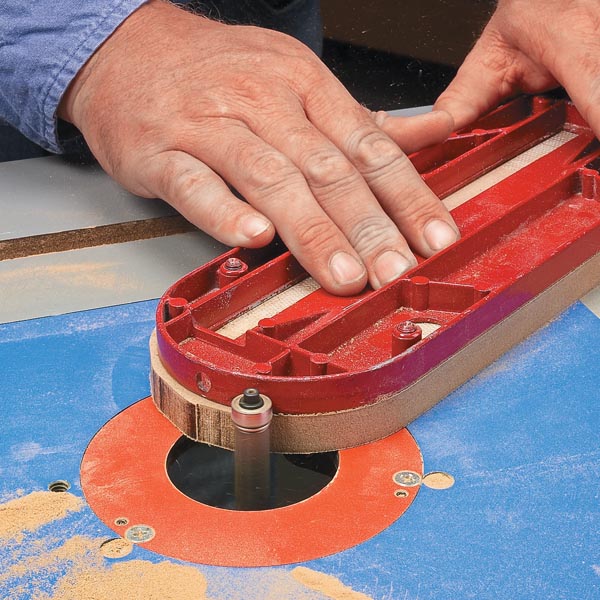
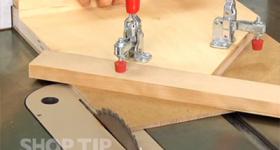
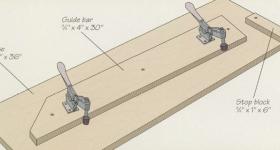
The second step is to trim the blank flush with the template. It’s a quick job at the router table. But you want to skip around the retaining pin and the notch for the blade guard. I sand these bumps away later.
두 번째 단계는 빈 플러시를 템플릿과 함께 트리밍하는 것입니다. 라우터 테이블에서 하는 일은 간단합니다. 하지만 블레이드 가드의 고정 핀과 눈금을 건너뛰기를 원할 수 있습니다. 나는 나중에 이 돌기들을 씻어서 제거합니다.
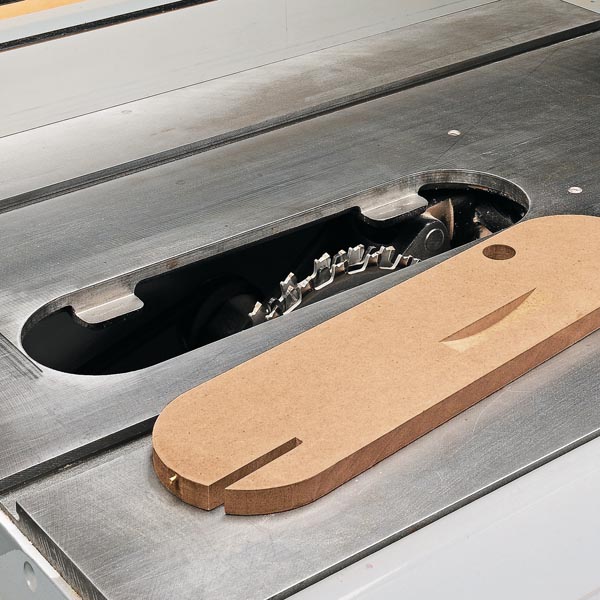
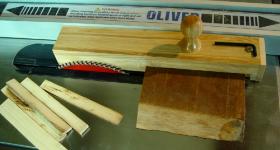
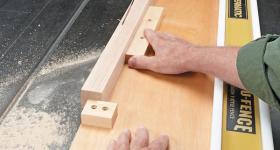
At this point, you can add a few details. A finger hole makes the insert easy to remove. Then I cut a notch to accommodate the blade guard.
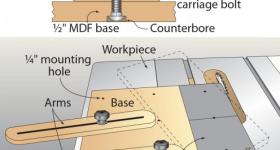
Another detail to add is a retaining pin to keep the insert from lifting out during use. The insert should also be flush with the saw table. If it isn’t, install set screws to raise it or rabbet the edge of the insert to lower the insert’s height. The last detail to add is a wide kerf in the bottom face. This provides clearance for some saw blades that won’t retract enough for an uncut insert to rest in the opening. Then, to create the blade kerf, clamp a board across the insert to hold it in place. Finally, turn on the saw and slowly raise the blade.
이때 몇 가지 세부 정보를 추가할 수 있습니다. 손가락 구멍으로 인서트를 쉽게 제거할 수 있습니다. 그리고 나서 나는 칼날 가드를 수용하기 위해 한 단계 잘라냈습니다.
추가할 또 다른 세부 사항은 사용 중 인서트가 빠지지 않도록 고정하는 핀입니다. 인서트는 톱 테이블과 같은 높이여야 합니다. 그렇지 않은 경우 고정 나사를 설치하여 올리거나 삽입물의 높이를 낮추기 위해 삽입물의 가장자리를 랍베팅합니다. 마지막으로 추가할 세부 사항은 아래쪽 면의 넓은 연골입니다. 이렇게 하면 절단되지 않은 인서트가 개구부에 놓일 정도로 접히지 않는 일부 톱날의 간극이 제공됩니다. 그런 다음 블레이드 연석을 만들려면 삽입물을 가로질러 보드를 고정하여 제자리에 고정합니다. 마지막으로, 톱을 켜고 천천히 날을 올리세요.