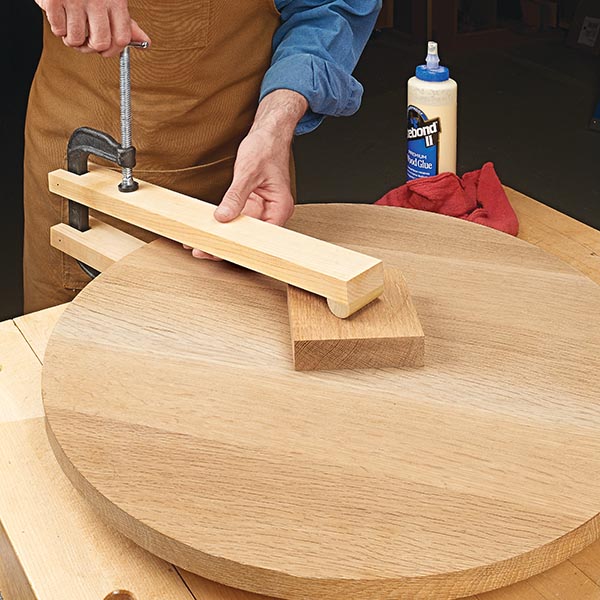
폭이 넓은 판재를 조립 할 때 판재 중심부분을 클램핑 하기는 쉽지 않습니다.
저 같은 경우 각재를 살짝 각이 생기도록 V컷팅한 후 양끝에서 클램핑 해 가운데를 누를 수 있는 방법을 주로 사용하는데 이번주 우드스미스 팁에 좋은 방법이 있어 소개합니다.
그런데 압력은 어느 정도 될지 테스트 해봐야 할 것 같네요.
Extended Reach Clamps
Here's a simple way to extend the reach and the life of your humble old C-clamp.
클램프 확장 여기 여러분의 보잘것없는 C클램프의 범위와 수명을 연장하는 간단한 방법이 있습니다.
I’ve occasionally had a need to put clamping pressure on a spot that was out of reach of any of my clamps. Since I could never justify the cost of long reach clamps, I add an extended set of jaws to my C-clamps.
때때로 내 클램프가 닿지 않는 곳에 클램핑 압력을 가해야 할 일이 생깁니다. 긴 리치 클램프의 비용을 감당할 수 없었기 때문에 C 클램프에 확장된 죠를 추가했습니다.
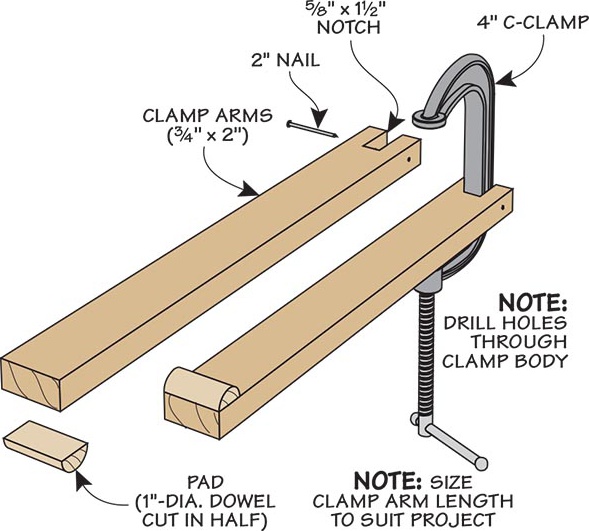
Start by cutting two pieces of hardwood that will reach the spot you need to clamp. Then drill a hole through one end and cut a notch to fit around the clamp body. You can drill holes through the clamp body at points that will provide the throat distance you need, accounting for some deflection of the arms. I glued pads to the bars and then attached the bars to the clamp body with a nail. When you’re done, you can remove the extended jaws and return the C-clamp to its intended function.
클램핑해야 하는 지점에 도달할 두 개의 단단한 막대(죠로 사용하기 위한) 조각을 자르는 것으로 시작합니다. 그런 다음 한쪽 끝을 구멍을 뚫고 클램프 본체에 맞도록 홈을 가공합니다. 암의 약간의 편향을 고려하여 필요한 지점에서 클램프 본체에 구멍을 뚫습니다. 막대에 패드를 붙이고 못을 이용해 막대를 클램프 본체에 부착했습니다. 작업이 끝나면 확장된 죠를 제거하고 C-클램프를 본래 기능으로 사용할 수 있습니다.
 [팁/노하우] 테이블쏘로 알판(면판) 엣지 만들기
 [JIG] 문 부착 핼프 지그


