상감은 여러가지 포인트 요소로 많이 사용하게 되는데 특히, 전통가구에서는 문이나 서랍의 전면 테두리에 많이 사용합니다.
특히 아자(亞字) 상감은 최고의 난이도를 요구합니다.
이번 Woodsimth 팁으로 상감기법이 있어 소개합니다.
Shop-Made Inlay Banding
Even very small scraps of exotic hardwoods can be put to good use in a decorative pattern of inlay banding.
핸드메이드 상감만들기
아주 작은 이국적인 하드우드 조각이라도 상감의 장식 패턴에 잘 사용할 수 있습니다.
Adding a decorative band of inlay to a simple project is a great way to transform it from ho-hum to spectacular. Of course, you can buy commercially made banding, but I prefer to make my own using scraps of exotic or figured woods. It’s a great way to use up those small cutoffs from other projects. Although it may seem complicated, making this banding is just a matter of following a simple, step-by-step process.
간단한 작업에 장식용 상감을 추가하는 것은 지루함을 장관으로 변신시키는 좋은 방법입니다. 물론 상업적으로 만들어진 상감을 구입할 수도 있지만 나는 이국적이거나 조각된 나무 조각을 사용하여 직접 만드는 것을 선호합니다. 다른 작업에서 나온 작은 동가리를 활용하는 좋은 방법입니다. 복잡해 보일 수 있지만 이 상감을 만드는 방법은 간단한 단계별 프로세스를 따르면 됩니다.
OVERVIEW. In a nutshell, making banding starts by gluing up thin layers of contrasting wood to create a sandwiched blank. Then, you cut the blank into short blocks, rearrange them, and glue them back together to create a pattern. Finally, you rip thin strips from the edge of this patterned blank to create the decorative banding.
개요. 간단히 말해서, 상감은 빈 공간을 만들기 위해 대조되는 목재의 얇은 층을 접착하여 붙이는 것으로 시작됩니다. 그런 다음 빈 칸을 짧은 블록으로 자르고 다시 배열한 다음 붙여서 패턴을 만듭니다. 마지막으로 이 패턴이 있는 블랭크의 한 쪽 끝에서부터 얇게 켜서 장식용 상감재를 만듭니다.
START WITH THE DESIGN. As with any project, you need to begin with a plan. I created the banding shown below (and throughout this article) to use on a picture frame.
디자인부터 시작하십시오. 모든 프로젝트와 마찬가지로 계획부터 시작해야 합니다. 그림 프레임에 사용하기 위해 아래(및 이 기사 전체)에 표시된 밴딩을 만들었습니다.
FIND THE RIGHT STOCK. The first stop is your cutoff bin to find some interesting pieces of stock. You’ll get the best results by combining contrasting woods. (For example, I started by combining holly and Macassar ebony.) But you’ll also need to be mindful of how the finished product will look with the project. Once you’ve found the right combination, you’re ready to get busy. No matter what wood you choose, the first step is to plane your stock to the correct thickness.
적당한 동가리를 찾으십시오. 첫 번째 할 일은 적당한 부재를 찾기 위한 당신의 동가리들을 모아놓은 곳입니다. 대조되는 목재를 조합하면 최고의 결과를 얻을 수 있습니다.(예를 들어 Holly(호랑가시나무)와 Macassar Ebony(흑단)를 조합하는 것으로 시작했습니다.) 그러나 완성된 상감이 완성 제품과 함께 어떻게 보일지도 염두에 두어야 합니다. 일단 적절한 조합을 찾았을 때, 여러분은 바빠질 준비가 되어 있습니다. 어떤 목재를 선택하든, 첫 번째 단계는 재고를 올바른 두께로 평판화하는 것입니다.
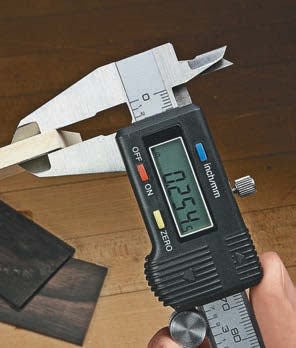
THICKNESSING. I designed this banding to fit into a shallow, 1 ⁄ 2 "-wide routed channel. To make sure you end up with a perfect fitting band, you’ll need to pay close attention to the thicknesses of the individual layers in the sandwich. Since the combined thickness of those layers determines the width of the band, I use a caliper to make frequent measurements as I plane them. I planed the ebony to 1 ⁄ 8 " and the holly to 1 ⁄ 4 ". Later, you’ll add two 1 ⁄ 16 "-thick layers of ebony to bring the total width of the band to 1 ⁄ 2 ".
I use a drum sander to sand stock for these very thin strips. But you can do it by hand as well.
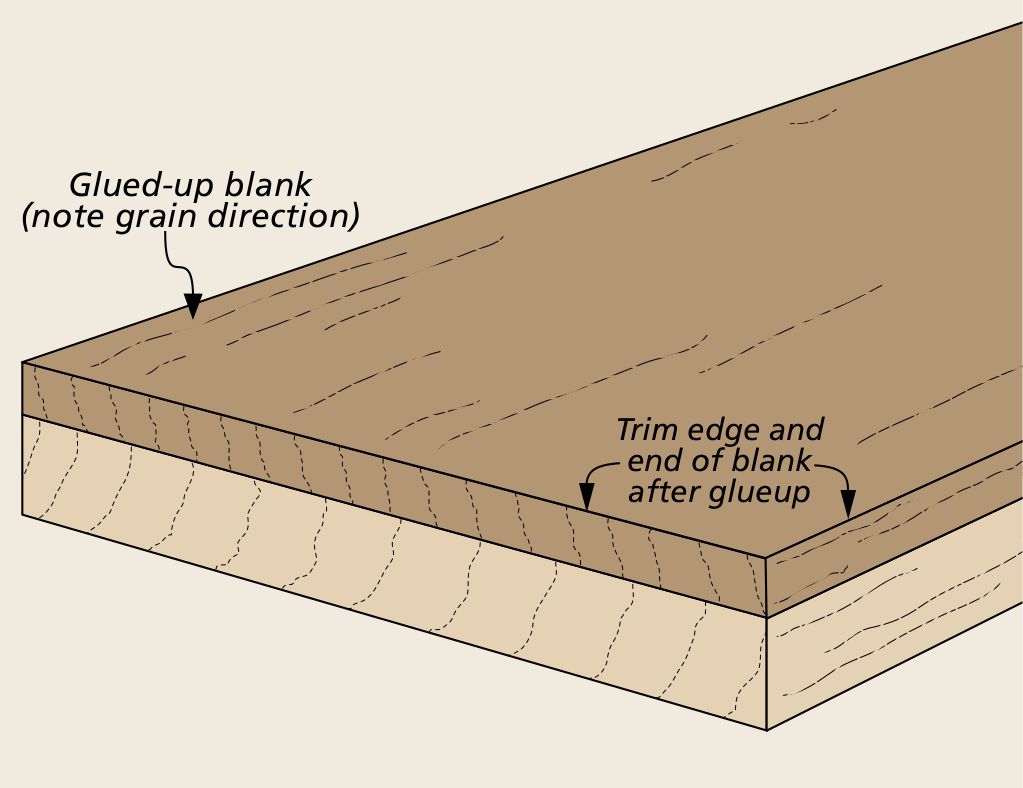
Another important consideration is the grain orientation of the blanks. You’ll want the finished band to display face or edge grain, not end grain. The drawing at below shows the correct grain direction.
두께감. 나는 이 상감을 폭이 1 ⁄ 2" 너비의 얕은 루티드 채널에 맞도록 디자인했습니다. 완벽게 어울리는 상감을 얻으려면 상감재 각 층의 두께에 세심한 주의를 기울여야 합니다. 이러한 층들을 합한 두께가 상감의 폭을 결정하기 때문에 캘리퍼스를 사용하여 평면을 만들 때 자주 측정합니다. 흑단은 1 ⁄ 8"로, 홀리는 1 ⁄ 4"로 계획했는데, 나중에 1 ⁄ 16" 두께의 흑단 두 겹을 추가하면 상감 전체 폭을 1 ⁄ 2"로 만들 수 있습니다.
저는 드럼 샌더를 사용하여 이 매우 얇은 상감재의 스톡을 샌딩합니다. 하지만 손으로도 할 수 있습니다.
또 다른 중요한 고려 사항은 빈 칸의 결 방향입니다. 완성된 상감에 끝 결이 아닌 면 또는 가장자리 결이 표시되기를 원할 것입니다. 아래 그림은 올바른 결 방향을 보여줍니다.
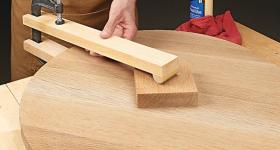
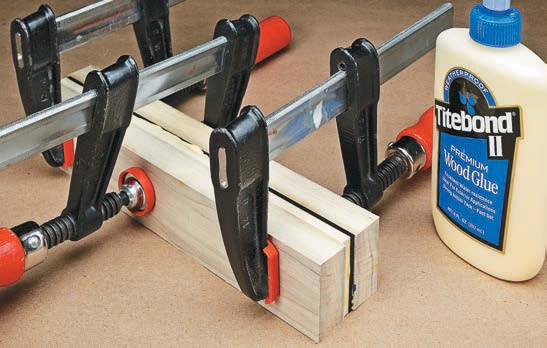
집성. 블랭크를 최종 두께로 대패질하거나 샌딩한 후에는 초기 상감재를 붙일 차례입니다. 아래 사진에서 볼 수 있듯이 클램핑 압력이 고르게 분산되도록 부목을 사용했습니다. 조립한 상감재에 틈이 보일 수 있으므로 단단히 조이도록 예방 조치를 취하는 것이 좋습니다.
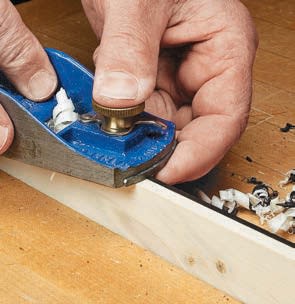
정리. 접착제가 마르면 블록 평면이나 스크레퍼를 사용하여 한쪽 가장자리에서 접착제가 삐져나온 부분을 청소할 수 있습니다. 그런 다음 테이블쏘에서 반대쪽 가장자리를 평행하게 켜고 양쪽 끝을 직각으로 만듭니다. 이제 상감의 기본 구성 요소인 깨끗하고 정사각형 상감재가 생겼습니다.
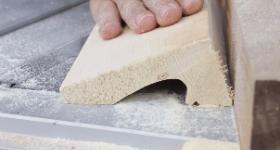
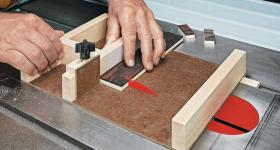
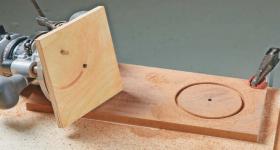
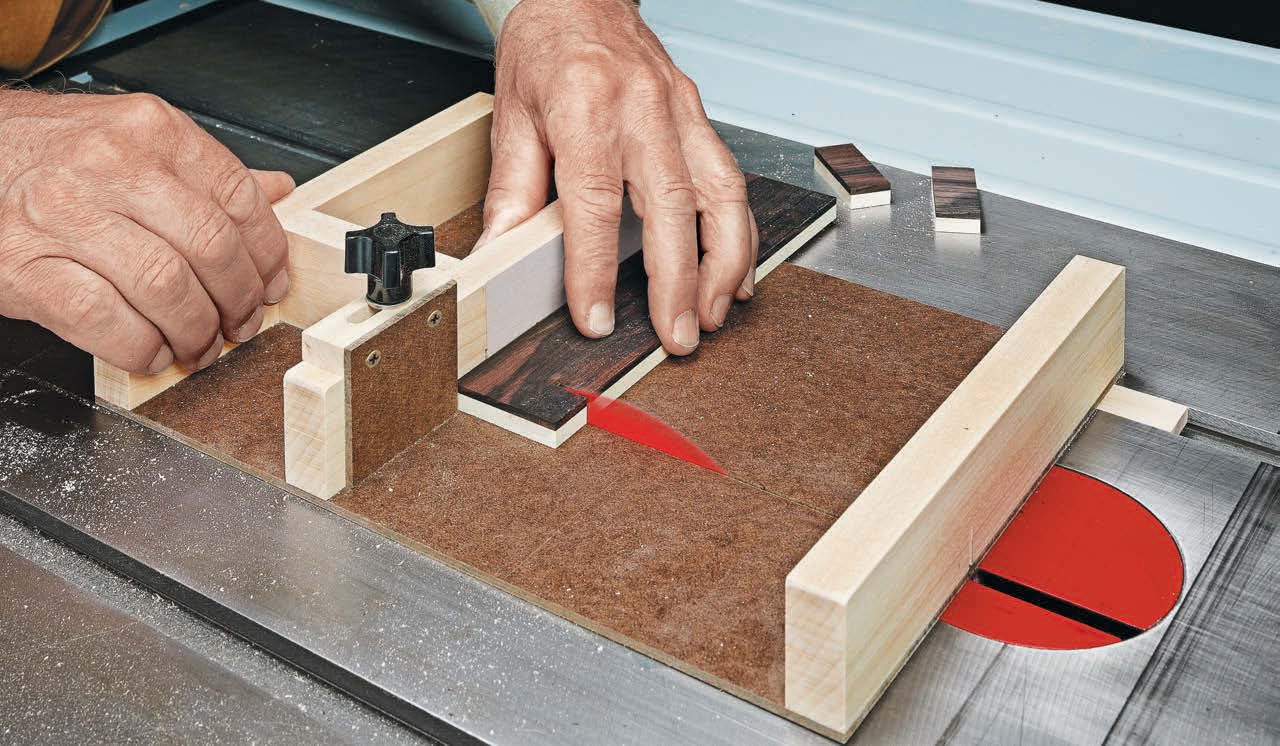
절단. 다음 단계는 상감재를 작은 조각으로 교차 절단하는 것입니다. 이를 위해 메인 사진에 표시된 썰매지그를 사용했습니다. 썰매지그에는 정확성을 보장하기 위해 조정 가능한 스토퍼 장치가 있습니다(계획은 아래 상자 참조). 나는 또한 테이블쏘에 7 1/4"-직경 원형 톱날을 장착했습니다. 더 얇은(1/16") 톱날을 사용해 낭비를 줄입니다.
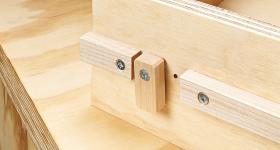
How-To: Make a Precision Crosscut Sled
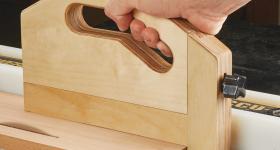
A crosscut sled is a must for making this style of banding. Fortunately, it doesn’t have to be anything too complicated. The sled shown at right is simply an 1/8 " hardboard base with hardwood front and back supports and a runner to fit in the miter gauge slot. The supports hold the sled together as you cut through the base.
How-To: 정밀 절단 썰매지그 만들기
이런 스타일의 상감재를 만들기 위해서는 절단 썰매지그가 필수입니다. 다행히도 너무 복잡할 필요는 없습니다. 오른쪽에 표시된 썰매지그는 전면 및 후면 지지대와 마이터 게이지 슬롯에 맞는 러너가 있는 1/8" 하드보드 베이스로 구성됩니다. 지지대는 베이스를 절단할 때 썰매지그에 함께 고정합니다.

The stop block slides on the fence and is locked in place with a studded knob that screws into a threaded insert in the fence. I also added adhesive-backed 220-grit sandpaper to the fence to help prevent the block from shifting. It all works together to guarantee a square cut.
중앙에는 조정 가능한 스톱 블록이 있는 단단한 나무 조기대가 있어 매우 정확한 절단 작업을 할 수 있습니다. 조기대 뒤에는 손가락을 안전하게 보호하기 위해 칼날 보호대 역할을 하는 십자 지지대를 추가했습니다.
스톱 블록은 조기대에서 미끄러지며 조기대의 나사형 인서트에 나사로 고정되는 스터드형 노브로 제자리에 고정됩니다. 저는 또한 블록이 이동하는 것을 방지하기 위해 울타리에 접착제로 지지된 220grit 사포를 추가했습니다. 이 모든 것은 직각 절단을 보장하기 위해 함께 작동합니다.
Assembling the BANDING BLOCK
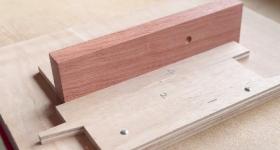
With the blocks cut to length, you’re ready to move on to assembling them to form the pattern. To do this, I used a flat piece of melamine with a strip of hardwood edging attached. The melamine is reliably flat and glue won’t stick to it very well, so it’s a good choice for this task. The hardwood edging provides a straight reference edge when putting together the blocks to form the pattern.
BANDING BLOCK 조립
상감재를 길이에 맞게 자르고 자른 상감재를 조립하여 패턴을 형성할 준비가 된 것입니다. 이를 위해 단단한 나무 테두리가 부착된 평평한 멜라민 조각을 사용했습니다. 멜라민은 안정적으로 평평하고 접착제가 잘 붙지 않으므로 이 작업에 적합합니다. 부목을 사용해 패턴을 형성하기 위해 상감재를 함께 넣을 때 직선 참조 가이드를 제공합니다.
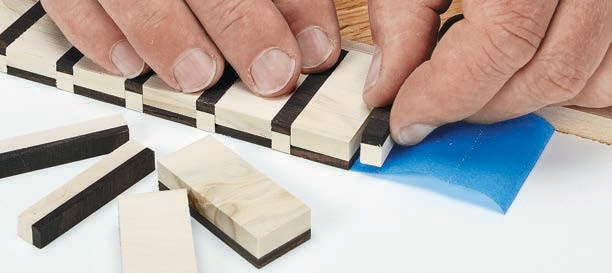

PATTERN. You’ll also notice in the photos that I started and ended the banding pattern with a wide block on each end. This will give you greater flexibility when it comes to trimming or mitering the finished banding to fit your project. You’ll want a symmetrical fit where two pieces meet in the corners.
무늬. 또한 사진에서 양쪽 끝에 넓은 블록으로 상감 패턴을 시작하고 끝낸 것을 알 수 있습니다. 이렇게 하면 작업 목표에 맞게 완성된 상감재를 트리밍하거나 마이터링할 때 더 큰 유연성을 얻을 수 있습니다. 두 조각이 모서리에서 만나는 대칭적인 핏을 원할 것입니다.
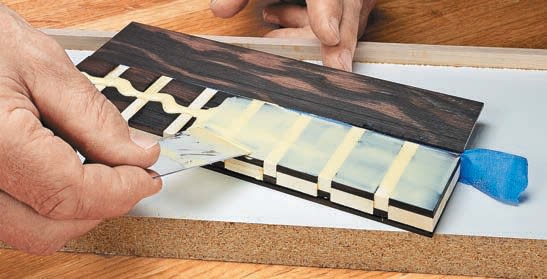
스택을 함께 고정하기 위해 어셈블리 보드에 마스킹 테이프 스트립(끈적한 면이 위로 향함)을 사용합니다. 이렇게 하면 상단 사진과 같이 넓은 스트립과 좁은 스트립을 번갈아 가며 뒤집어 테이프에 붙이기만 하면 엇갈린 디자인을 형성할 수 있습니다.
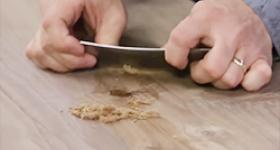
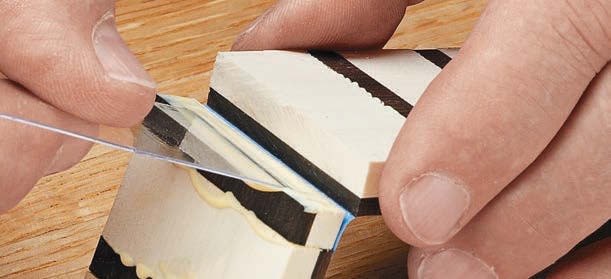
GLUEUP. Gluing up the pattern of blocks can be a bit of a challenge because of their small size and scant available glue surface. It’s important to spread the glue evenly across the surface to make sure you don’t end up with gaps in the finished banding. I find that a thin scrap of plastic makes the perfect tool for spreading glue into the crevices (middle photo).
집성. 잘라낸 상감재의 패턴을 만드는 것은 작은 크기와 사용 가능한 접착제 표면이 부족하기 때문에 약간 어려울 수 있습니다. 완성된 상감재에 틈이 생기지 않도록 표면 전체에 접착제를 고르게 펴 바르는 것이 중요합니다. 나는 얇은 플라스틱 조각이 틈새에 접착제를 바르는 데 완벽한 도구라는 것을 알게 되었습니다(가운데 사진).
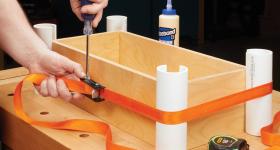
모든 블록을 다 덮었으면 블랭크를 평평한 표면에 놓고 부드럽게 눌러 여분의 접착제를 짜냅니다(테이프가 모든 것을 함께 고정합니다). 스퀴즈 아웃을 닦은 후 위 사진과 같이 블랭크를 느슨하게 조입니다. 약간의 압력을 가하고(접착제가 조금 더 짜낼 때까지) 약 30분 동안 고정된 상태로 둡니다. 이것은 다음 단계로 이동하기 전에 접착제를 설정하기에 충분한 시간입니다.
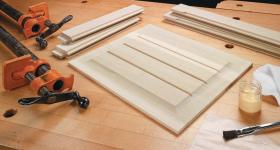
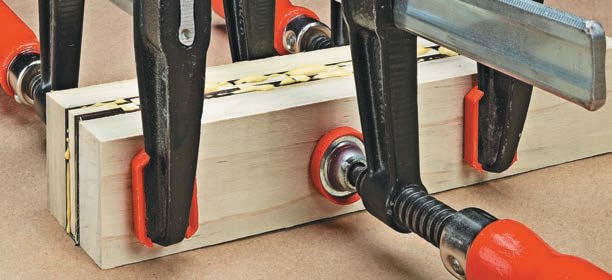
ADD THE BORDERS. After removing any glue squeezeout, you’re ready to add the top and bottom borders to the assembly. The 1 ⁄ 16 "-thick borders help define the banding when you install the strips in your project. Once again, I started by taping the edges of the pieces together and applying an even coat of glue.
Using the hardwood cauls as before, you can clamp the blank and add plenty of pressure. This time, I let the blank cure for a full 24 hours before moving on to the final two steps.
상감재 위아래에 테두리를 추가합니다. 삐져나온 접착제를 제거한 후 상단 및 하단 테두리를 부착할 준비가 된 것입니다. 1 ⁄ 16" 두께의 테두리는 작업에 스트립을 설치할 때 상감을 정의하는 데 도움이 됩니다. 다시 한 번 조각의 가장자리를 함께 테이프로 붙이고 접착제를 고르게 도포하는 것으로 시작했습니다.
이전과 같이 부목을 사용하여 상감재를 고정하고 충분한 압력을 가할 수 있습니다. 이번에는 상감재를 24시간 동안 경화시킨 후 마지막 두 단계로 넘어갑니다.
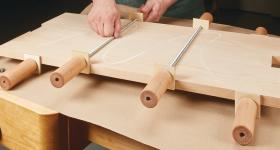
CLEAN UP THE BLANK. When the glue dries, you’ll need to clean up the blank again, just as you did earlier, by jointing one edge and ripping the other parallel. Once you’ve squared the blank, you’re ready to cut it into strips of banding.
상감재를 정리합니다. 접착제가 마르면 이전과 마찬가지로 한 쪽 면을 다듬고 다른 쪽 면은 테이블쏘로 켜서 상감재를 정리해야 합니다. 상감재를 제곱하면 밴딩 스트립으로자를 준비가 된 것입니다.
CUTTING THE BANDING. As before, I prefer to use the thin-kerf circular saw blade to minimize the waste when ripping the banding strips. And for these cuts, you’ll also need to make a zero-clearance insert for your table saw. If there is a gap between the blade and the opening of the insert, the thin strip can be pulled under as it passes through the blade.
상감재 절단. 이전과 마찬가지로 상감재를 켤 때 낭비를 최소화하기 위해 얇은 원형 톱날을 사용하는 것을 선호합니다. 그리고 이러한 절단을 위해 테이블 톱쏘 제로 인서트도 만들어야 합니다. 톱날과 인서트 사이에 틈이 있으면 얇게 켜낸 상감재가 톱날을 지나는 순간 인서트 속으로 떨어질 수 있습니다.
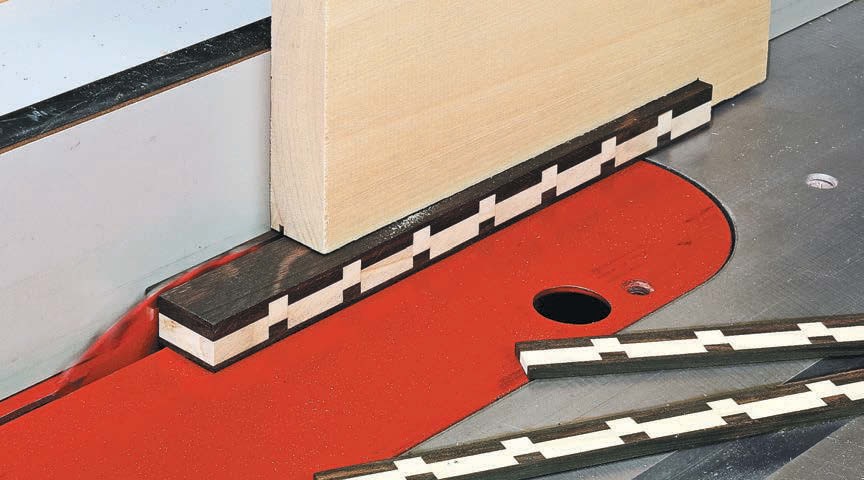
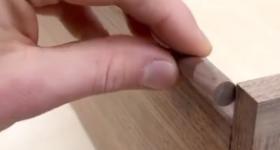
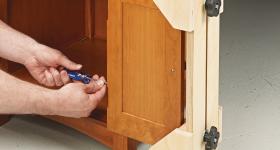
The thickness of the bands can vary, depending on your project. For the picture frame, I wanted the banding to sit slightly proud of the surface. So I cut the strips 3 ⁄ 16 " thick. This way, I could rout a 1 ⁄ 8 "-deep channel and still have the banding sit above the edge.
I positioned the fence 3 ⁄ 16 " from the blade and cut all the strips between the blade and the rip fence to ensure they were all the same thickness. As you can see in the photo above, I also made a sacrificial push block which not only controlled the workpiece, but kept my fingers safely away from the blade.
Now it’s just a matter of ripping the blank into strips. After that, sand them lightly to remove any saw marks. Then, you’re ready to add them to your project.
This technique can be applied to many different designs. The box below shows just a few possibilities. Once you get the hang of the process, you’ll find lots of applications for inlay banding.
상감재의 두께는 작업에 따라 다를 수 있습니다. 액자의 경우 상감 표면을 약간 드러내고 싶었습니다. 그래서 상감재를 3 ⁄ 16" 두께로 자릅니다. 이렇게 하면 1 ⁄ 8" 깊이의 채널을 라우팅할 수 있고 상감이 가장자리 위에 놓일 수 있습니다.
나는 조기대를 톱날에서 3 ⁄ 16" 위치에 놓고 톱날와 조기대 간격으로 모든 상감재를 잘라서 모두 같은 두께가 되도록 했습니다. 위의 사진에서 볼 수 있듯이 푸시 블록도 만들었습니다. 부재만 제어하고 톱날에서 손을 멀리할 수 있어 안전합니다.
이제 상감재를 길게 켭니다. 그런 다음 가볍게 샌딩하여 톱날 자국을 제거하십시오. 그러면 다음 작업에 사용할 준비가 된 것입니다.
이 기술은 다양한 디자인에 적용될 수 있습니다. 아래 이미지는 몇 가지 가능성을 보여줍니다. 작업 요령을 터득하면 상감에 대한 많은 응용 디자인을 찾을 수 있습니다.
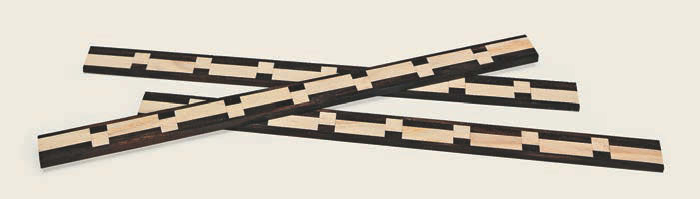
Options: Other Banding Styles
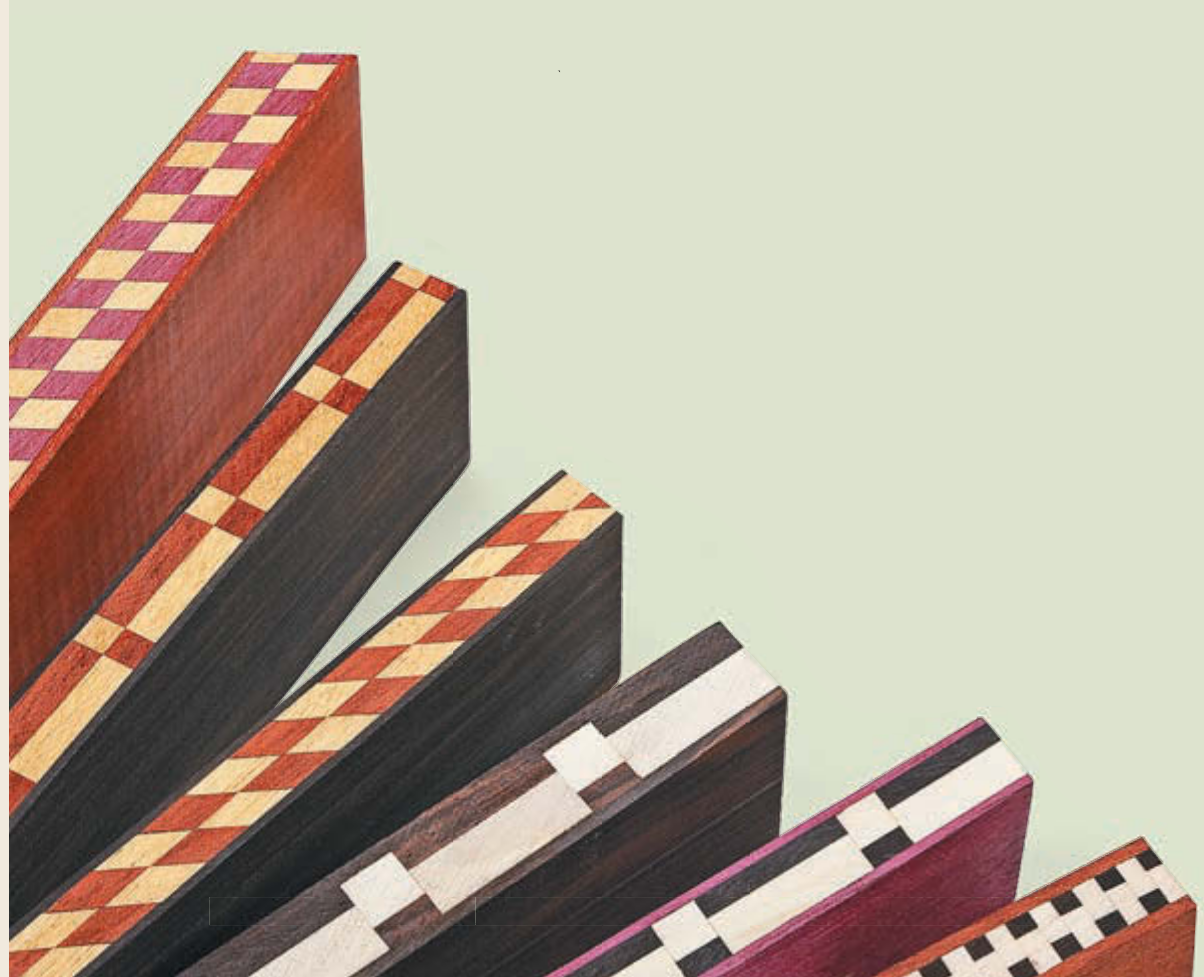
The banding shown in this article is just one of many styles you can make. The photos here show several other options. The good news is, they all rely on the same techniques for cutting, gluing, and assembling.
Of course, the easiest changes to make are the species of wood you use and the sizes of the blocks. In the photos here I used purpleheart, padauk, yellowheart, wenge, maple, mahogany, ebony, and holly. But whatever you find in your scrap box will work.
이 문서에 표시된 상감은 만들 수 있는 여러 스타일 중 하나일 뿐입니다. 여기 사진은 몇 가지 다른 옵션을 보여줍니다. 좋은 소식은 모두 절단, 접착 및 조립에 동일한 기술을 사용한다는 것입니다.
물론 가장 쉬운 방법은 사용하는 목재의 종류와 블록의 크기입니다. 여기 있는 사진에서는 퍼플하트, 파두크, 옐로우하트, 웬지, 메이플, 마호가니, 에보니, 홀리를 사용했습니다. 그러나 보관해논 동가리 목재는 무엇이든 가능합니다.
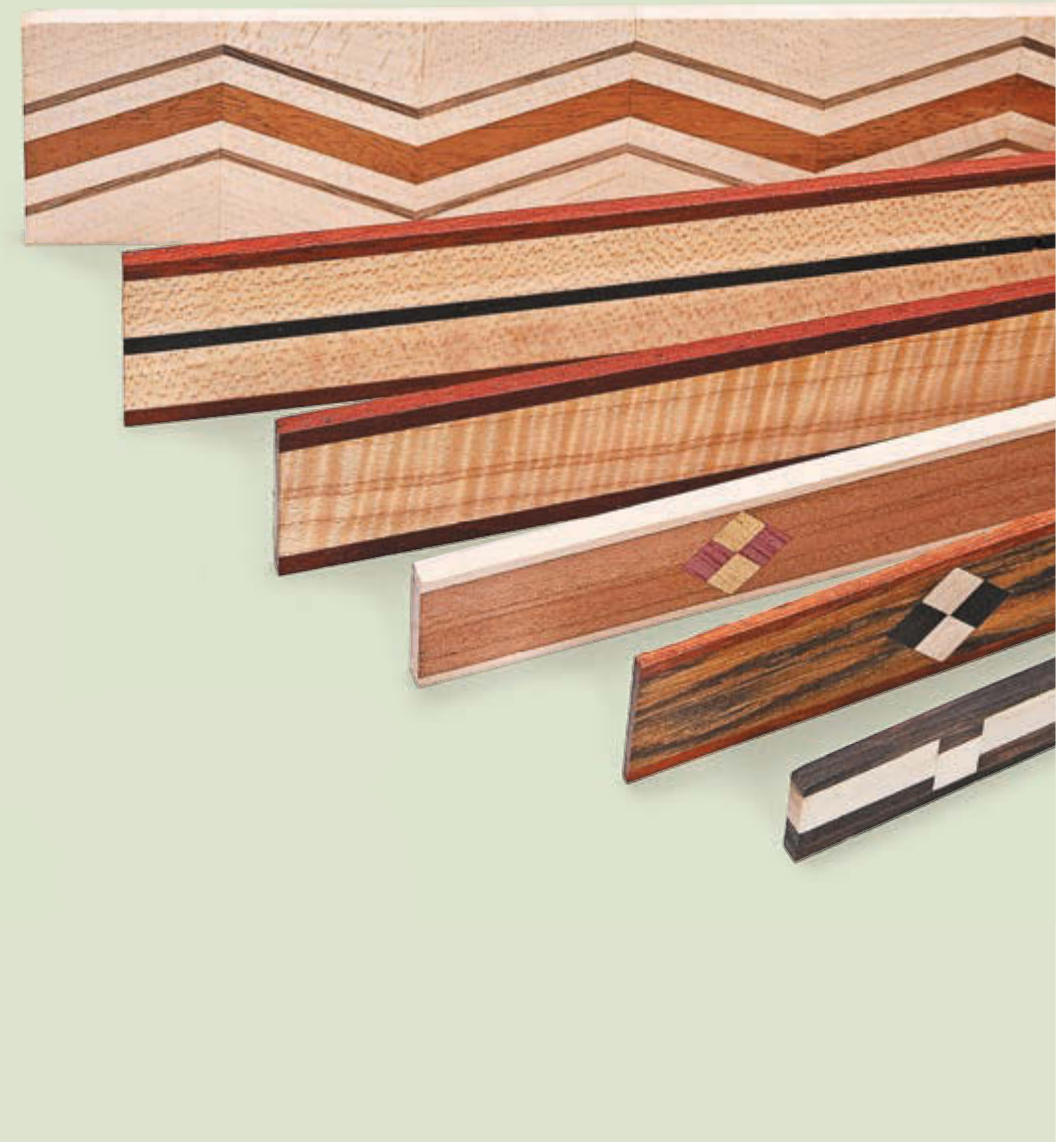
You can also get drastically different results simply by changing the thickness and width of the individual components.
For even greater variety, you might want to try cutting the blocks or the glued-up blank at an angle. This makes assembling the pieces a little more challenging. The glue will make them prone to shifting under clamping pressure. But the results can provide an amazing addition to your projects.
또한 개별 구성 요소의 두께와 너비를 변경하는 것만으로도 완전히 다른 결과를 얻을 수 있습니다.
더 다양하게 하려면 상감재나 접착된 상감재를 비스듬히 자르는 것이 좋습니다. 이것은 조각을 조립하는 것을 조금 더 어렵게 만듭니다. 접착제로 인해 클램핑 압력 하에서 움직이기 쉽습니다. 그러나 결과는 작업에 놀라운 추가 기능을 제공할 수 있습니다.