혼자 곡선을 그리기는 쉬운 일이 아니죠.
아주 편리한 지그이네요. 당장 하나 만들어 봐야겠습니다.
Adjustable Hardboard Arc
This shop-made arc makes quick work of creating curves.
조정 가능한 하드보드 곡선 그리는 방법
이 핸드메이드 지그를 사용하면 곡선을 빠르게 그릴 수 있습니다.
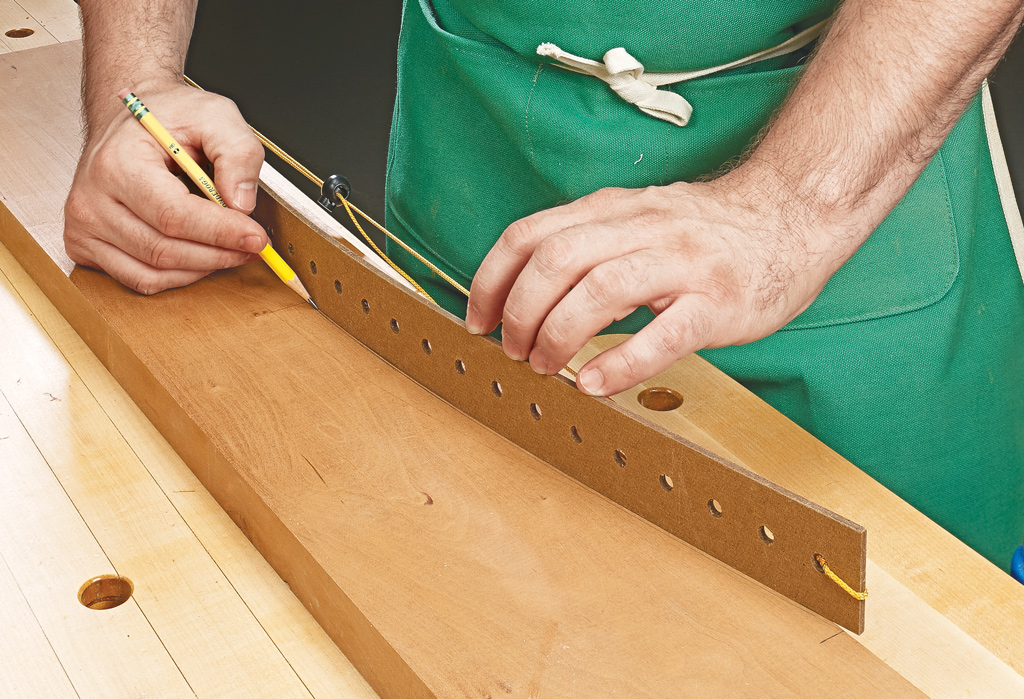
Trying to bend a long, flexible strip and trace an arc at the same time can be tricky. To make it easier, I made an adjustable arc that can be locked into any curved shape I want. The arc is made from a strip of 1⁄4" pegboard (about 24" long), a nylon string, and a cord lock that I bought at a fabric store. easy Assembly. First, cut the nylon string to twice the length of the pegboard strip and tie it to one end.
길고 유연한 자를 구부려 동시에 호를 그리는 것은 어려울 수 있습니다. 더 쉽게 하기 위해 원하는 곡선 모양으로 고정할 수 있는 조정 가능한 지그를 만들었습니다. 이 지그는 1/4인치 페그보드(길이 약 24인치), 나일론 끈, 그리고 제가 직물 가게에서 산 고정장치로 만들어졌습니다. 조립이 용이합니다. 먼저, 나일론 끈을 페그보드 스트립의 두 배 길이로 자르고 한 쪽 끝에 묶으세요.
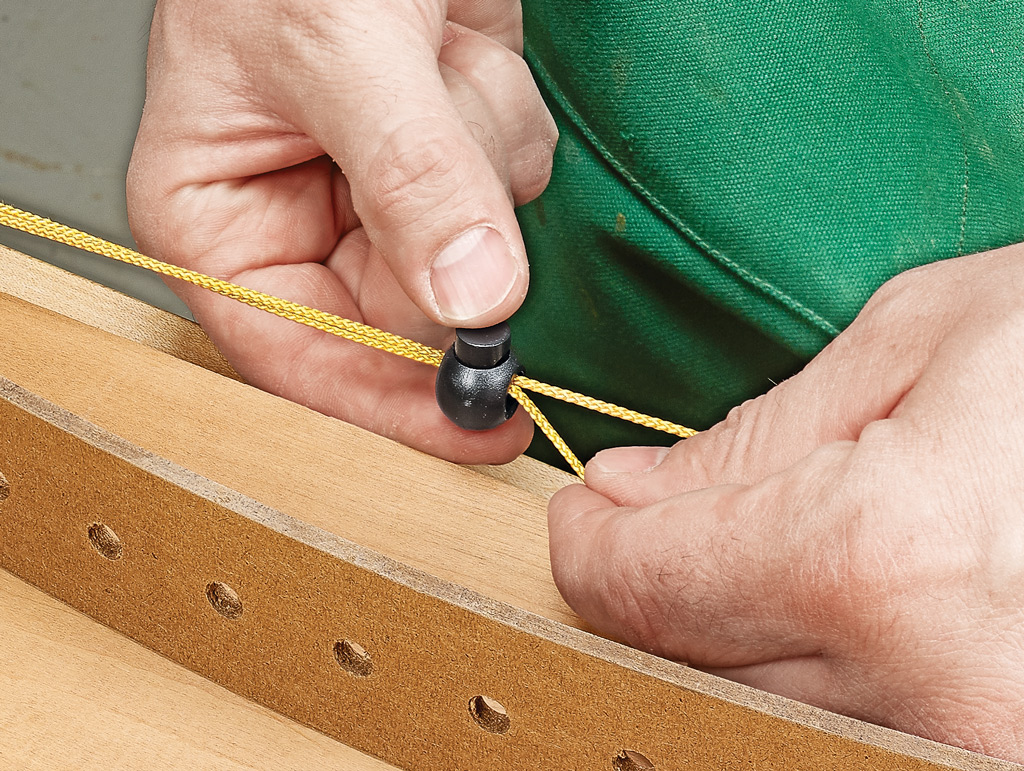
Next, slip one end of the string through the cord lock and then loop that same end through two holes in the opposite end of the strip. Finish up by feeding the string back through the cord lock. To change the size of the arc, simply move the looped end of the string into a different set of holes in the pegboard strip and adjust the cord lock.
다음으로, 페그보드 스트립의 양 끝에 있는 구멍을 통해 끈을 걸쳐줍니다. 고정 장치를 통해 끈을 다시 채워 마무리합니다. 곡선 크기를 변경하려면 페그보드 스트립의 다른 구멍 세트로 이동하고 코드 잠금을 조정하기만 하면 됩니다.
 [Etc] 클램프 활용 팁 - 확장


